Looking to convert your WooCommerce site into a multivendor marketplace? Look no further than the Multivendor Woocommerce Marketplace plugin. This robust plugin makes it easy to track sales from different merchants all in one centralized backend. Plus, it comes with great features like commission, withdrawals, payouts, and reviews.
Woocommerce VendorPlace Vendor’s Features:-
- Separate vendor profile and dashboard for each vendor.
- On a single product page, there is a product-selling counter.
- Display the seller’s name on the product details page.
- Vendors can edit profile information.
- Sellers can add products in-store and add product gallery images from the vendor dashboard.
- Every vendor’s goods receive feedback and a star rating.
- From the front end, vendors may edit, remove, update product photos, and create simple, grouped, external, and variable-type items.
- Product sales can be established by vendors.
- Sellers can add variations for a product.
- Vendors have access to a list of their products.
- Sellers have access to a list of their orders.
- Vendors only can view their order items.
- Sellers can add coupons, see coupon list.
- Sellers may request for withdrawal.
- Vendors can add multiple payment options for withdrawal using available add-ons.
- Sellers can include banners and shop logos.
- Vendors have access to their own sales reports.
- Vendors can add and crop avatar image.
- Option to reposition the vendor cover image.
admin Features:-
- Admin can enable or disable sales for vendors.
- Administrators can set varying commissions for vendors.
- Admin can define maximum and minimum amount withdrawals.
- Administrators have access to all vendor lists, order lists, product lists, and vendor withdrawal lists.
- Admin has access to a different vendor’s product list.
- Administrators may view all vendors’ sold products, sales amounts, and commission amounts.
- The front end may be configured to display a certain number of records on each page.
- Administrators can eliminate vendors and allocate all items to new vendors.
- If the vendor is disabled then their products will be automatically disabled.
- Woocommerce Multivendor Marketplace allows administrators to choose the background color of the multi-vendor menu and submenus.
- Administrators can allow or deactivate the display of the vendor’s name on the product information page.
- In the admin settings page, the admin may configure the display of false product amount with time length and text color of selling count.
Available add-ons
Available addon for Woocommerce Multivendor Marketplace extension
Download Procedure:
Once you download the Multivendor Marketplace plugin, you will get a file called unzip_multivendor_woocommerce_marketplace.zip. This file contains two files: a PDF document (a documentation file for the plugin) and the main plugin installer file. Read the document carefully and follow the installation instructions.
Installation of Marketplace Plugin:
Admin Settings:
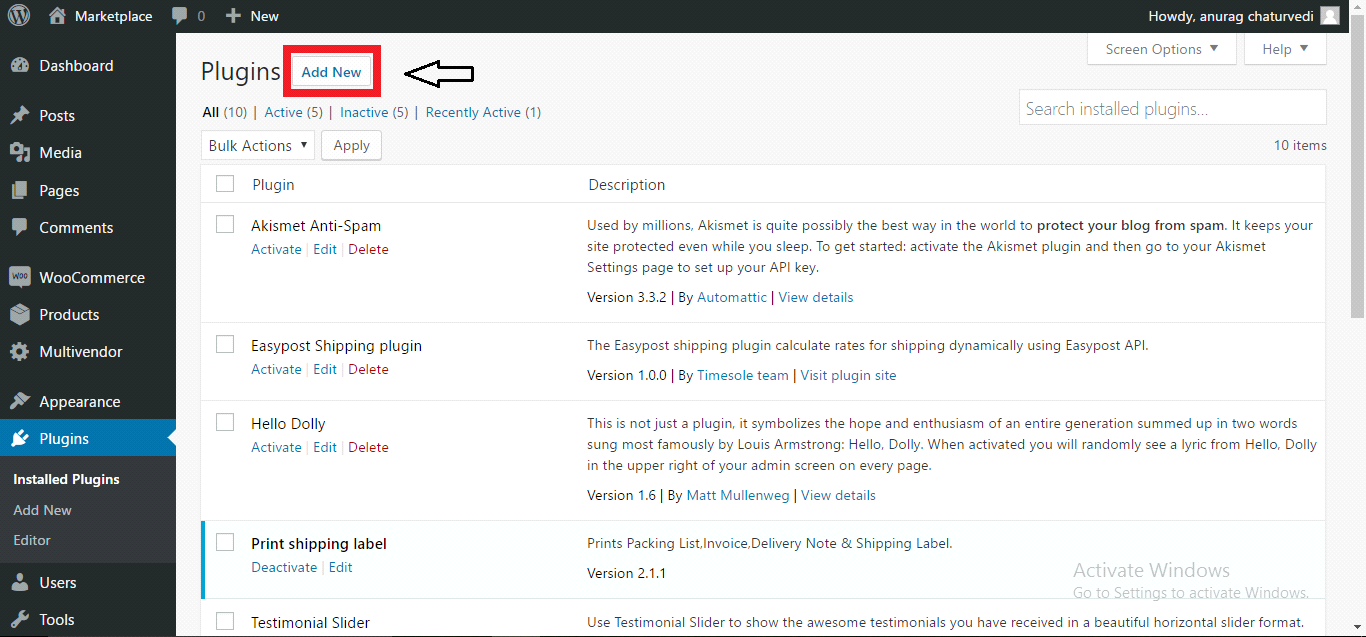
1. Go to WordPress Dashboard, and click on plugins.
2.Click on the Add New button as shown below in the snapshot.
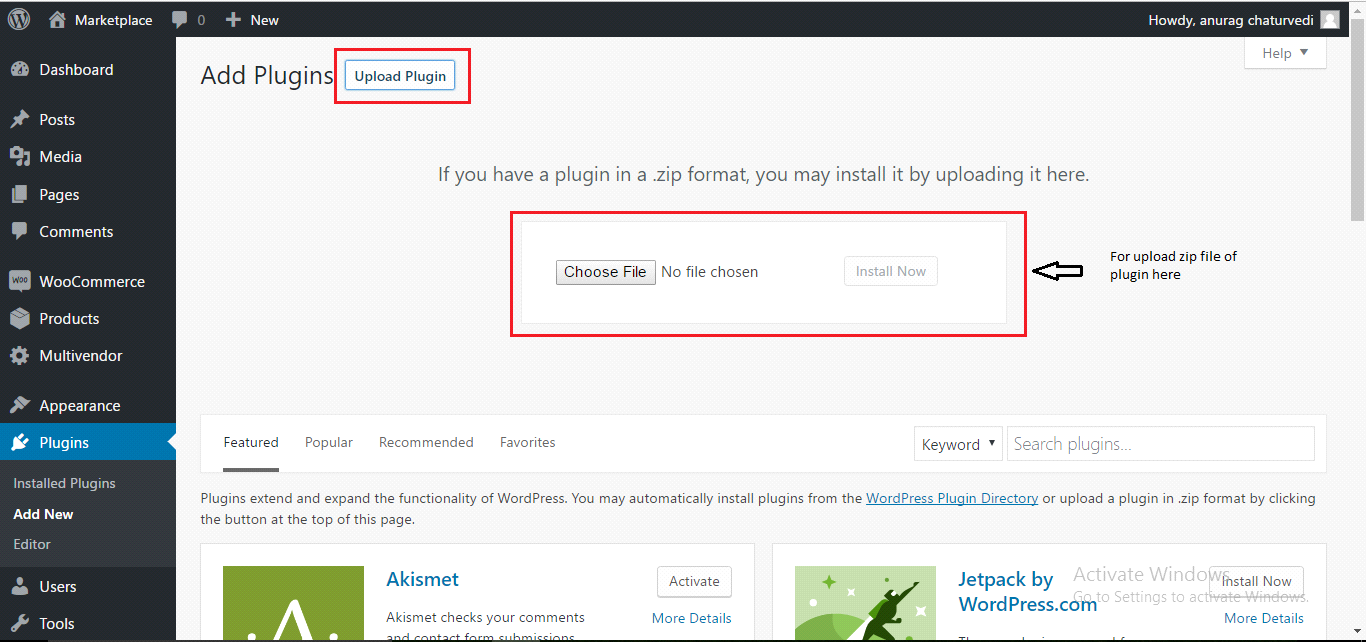
3. Click on the Upload Plugin button and upload the zip file of the plugin as shown below in the snapshot.
.
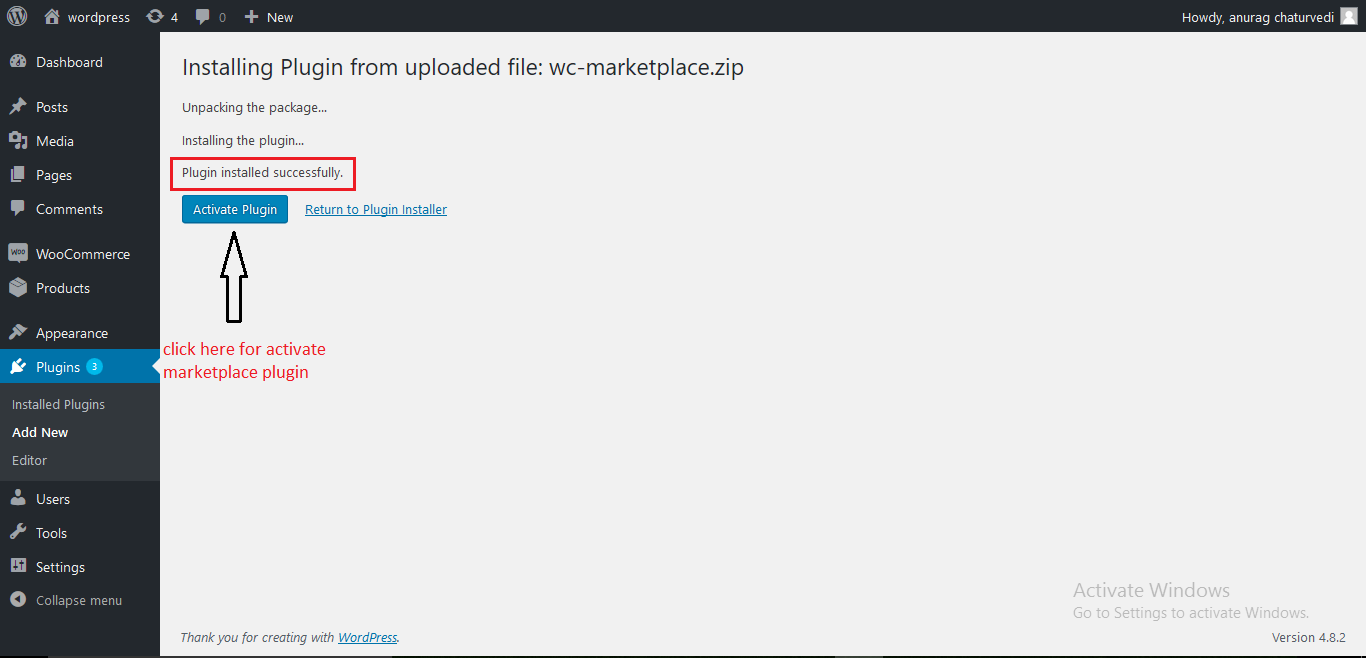
- After uploading the zip file, you will receive a notification “Plugin installed successfully” Click on the Activate Plugin button to activate the plugin as shown below in the snapshot.
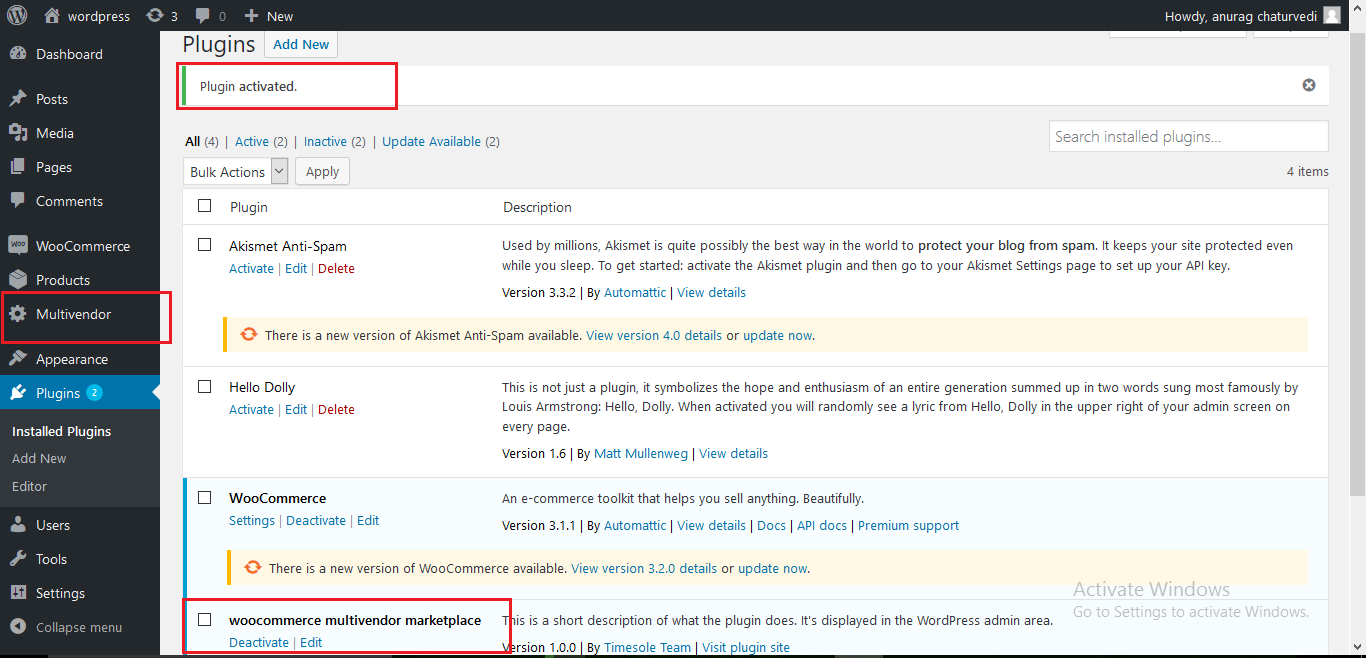
- After Activation you will see a notification “Plugin activated” and an option in the menu list. As shown below in the snapshot.
- Then click on the Appearance -> Widgets option in the menu list. As shown below in the snapshot.
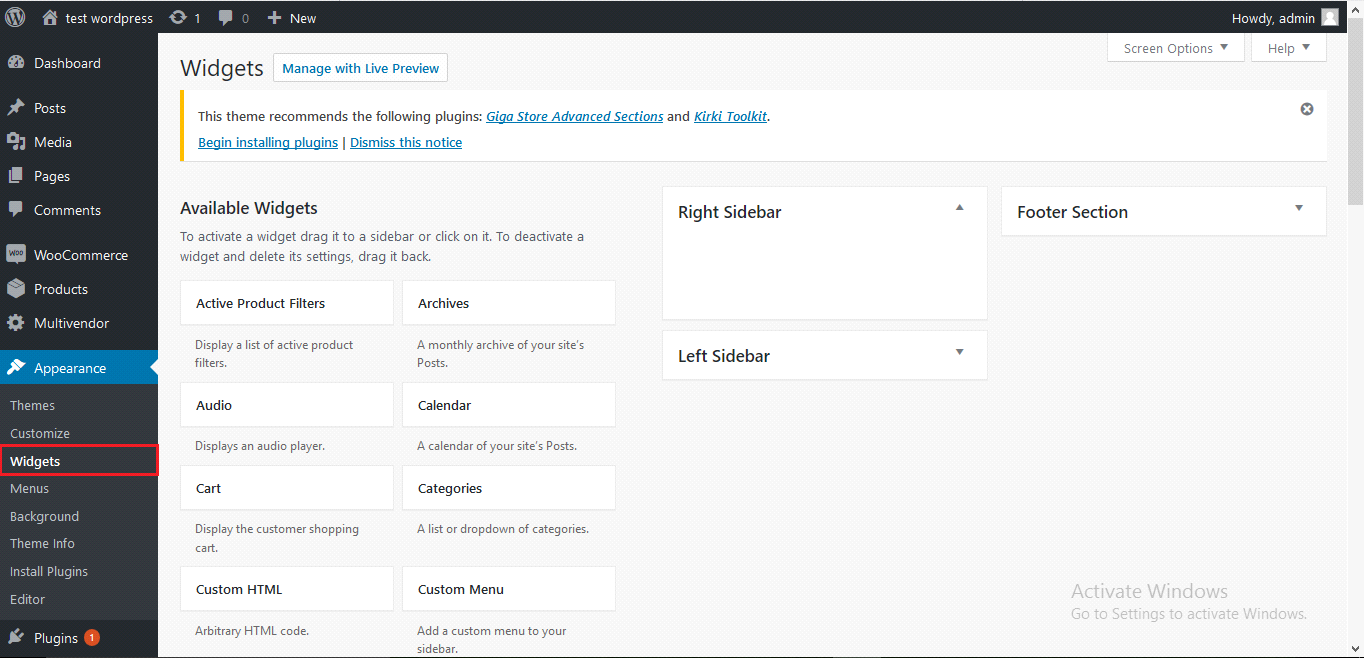
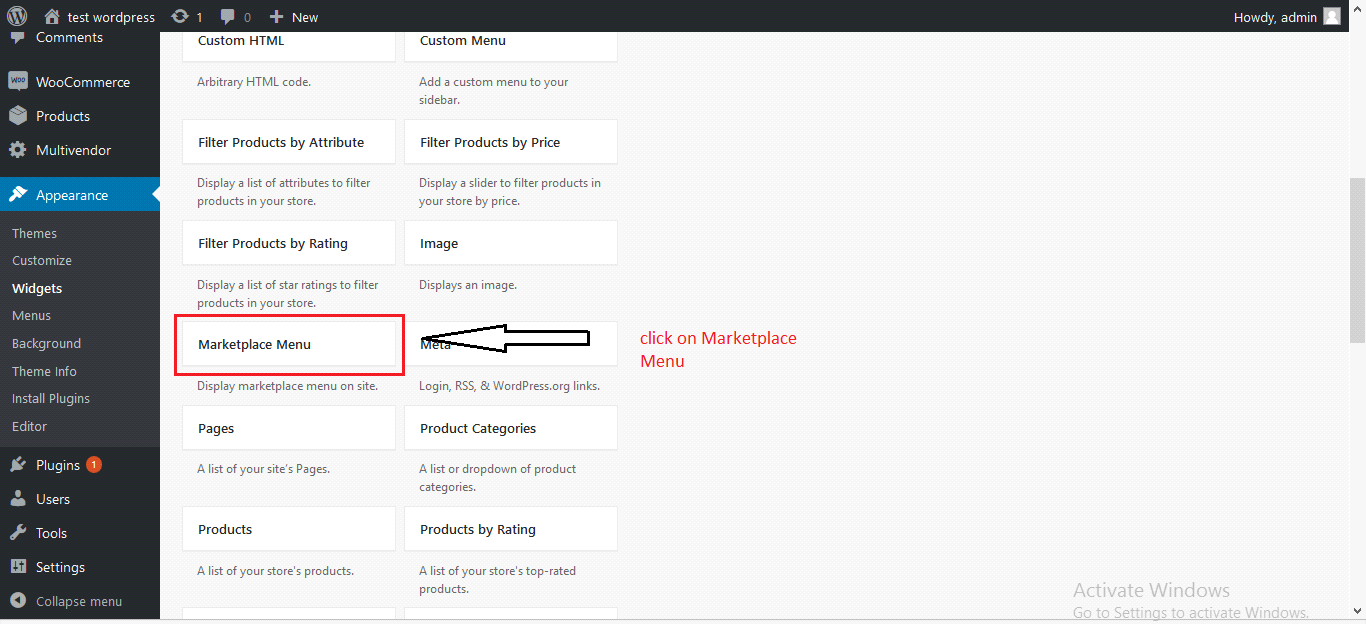
- Then click on Marketplace Menu Widget. As shown below in the snapshot.
- You can set the Marketplace Menu to the left sidebar, right sidebar and the footer section according to your theme. As shown below in the
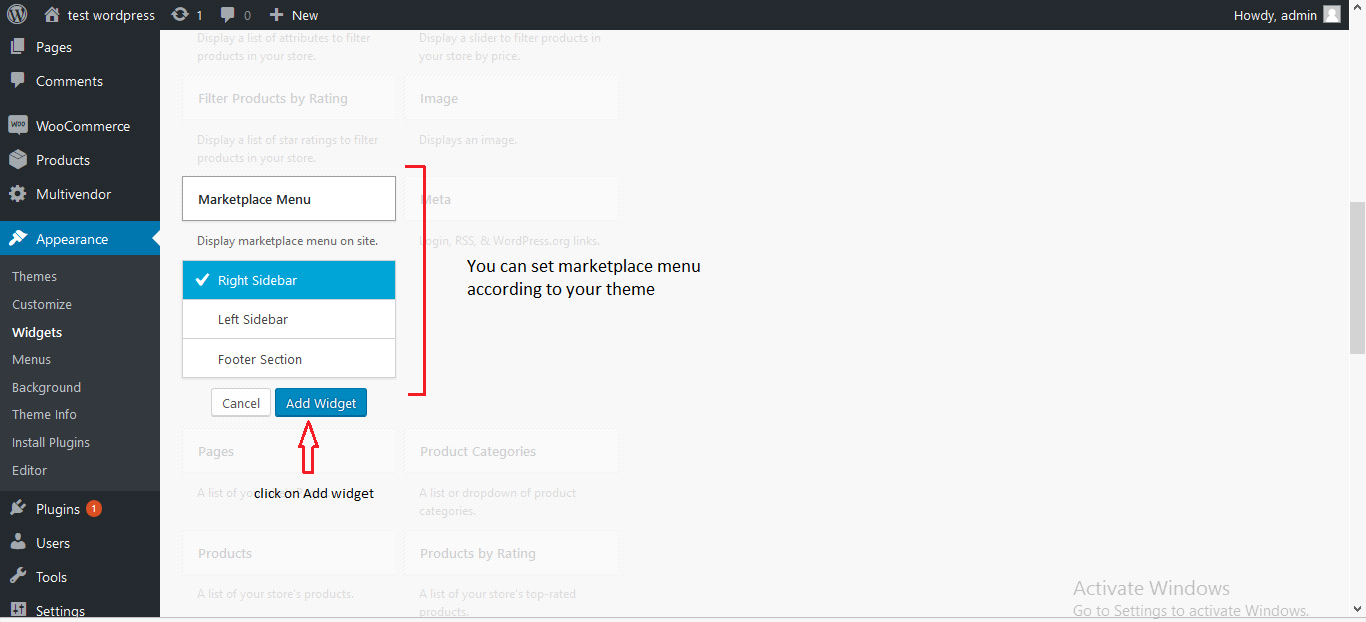
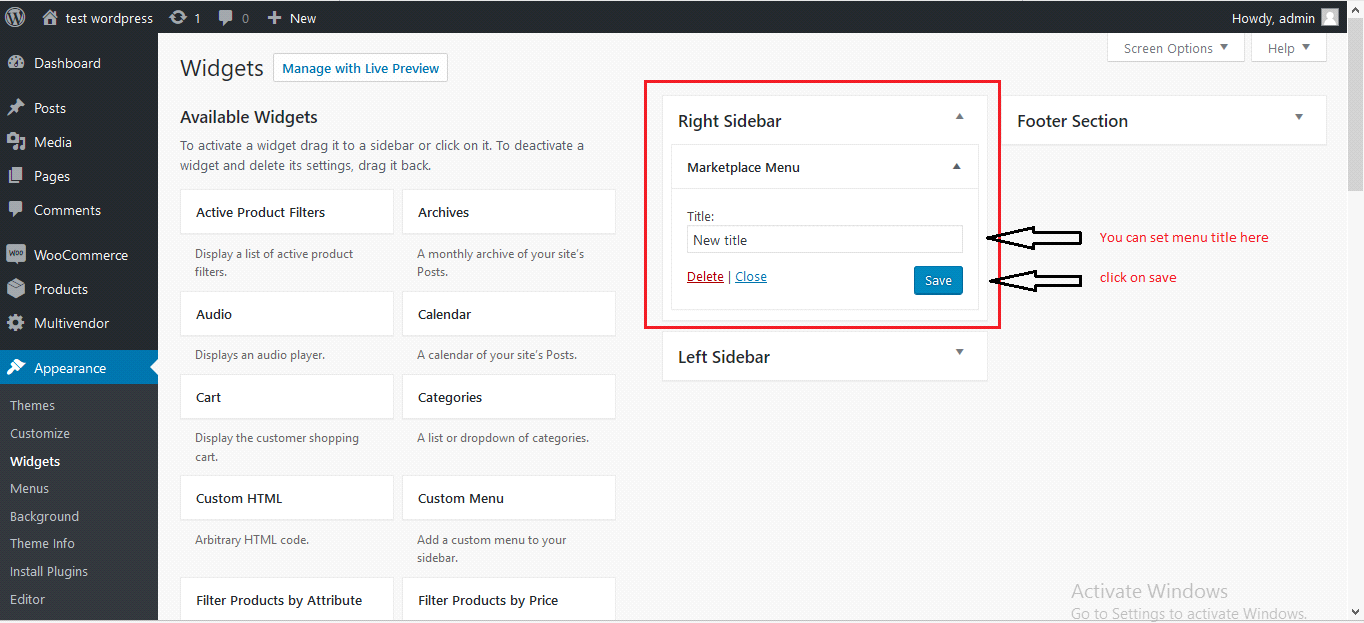
- You can set the menu title as shown below in the snapshot. You need to add the required pages for the marketplace menu to work and be shown in the widgets area. Menu content can be added from the appearance >> menu section.
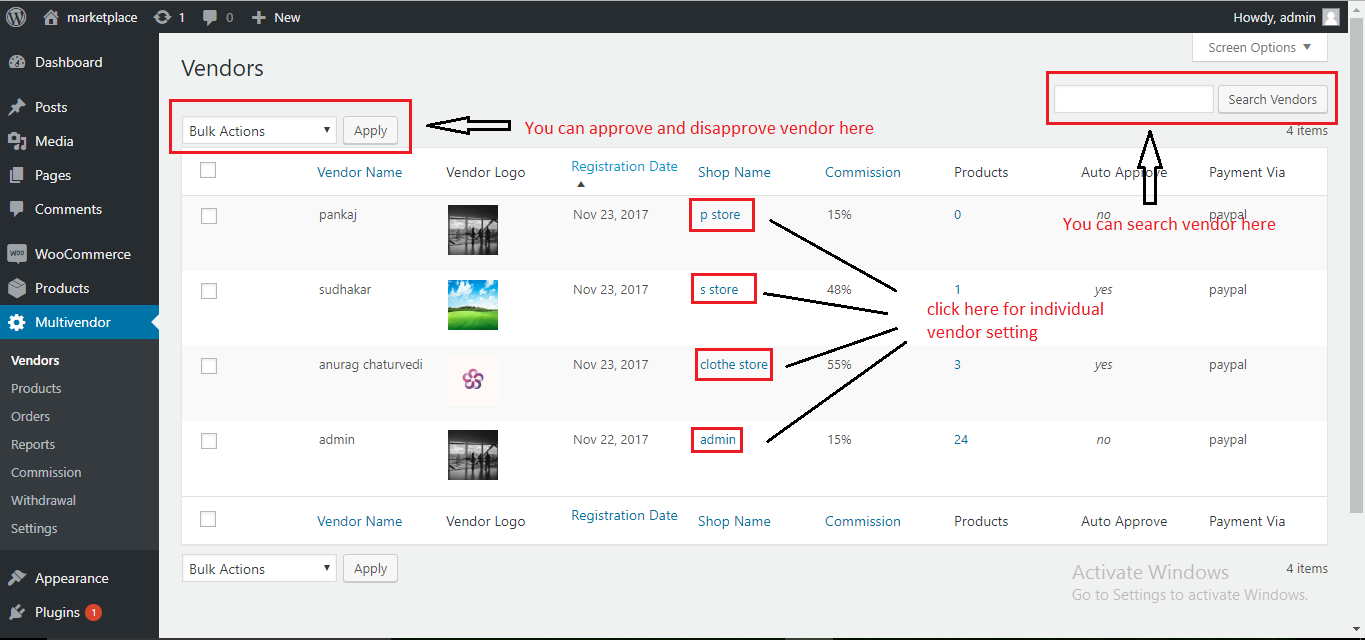
- Click on Multivendor in the menu list, you will see the vendor list. You can delete, approve, unapproved, and search vendors as shown below in the snapshot.
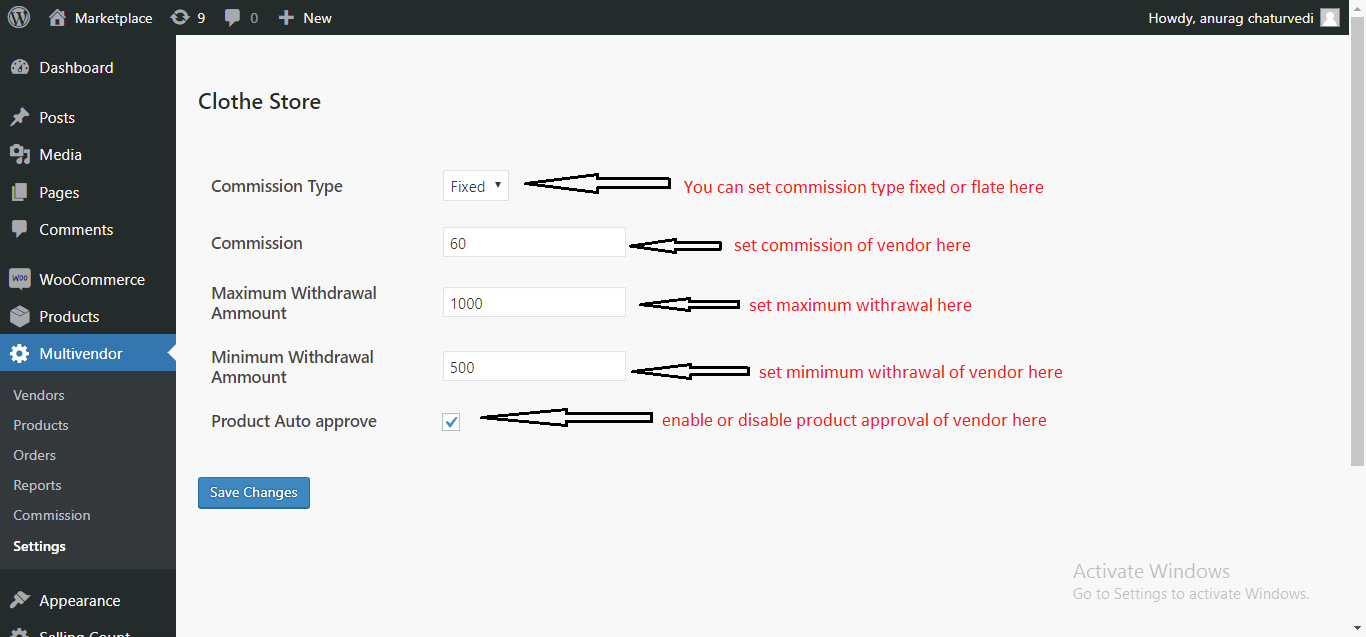
- After clicking on the shop name you will see the individual vendor setting page. on this page, you set vendor commission, maximum and minimum withdrawal, and enable or disable product auto approval. admin can charge commission on vendor from two way fixed commission or percentage commission as shown below in the snapshot.
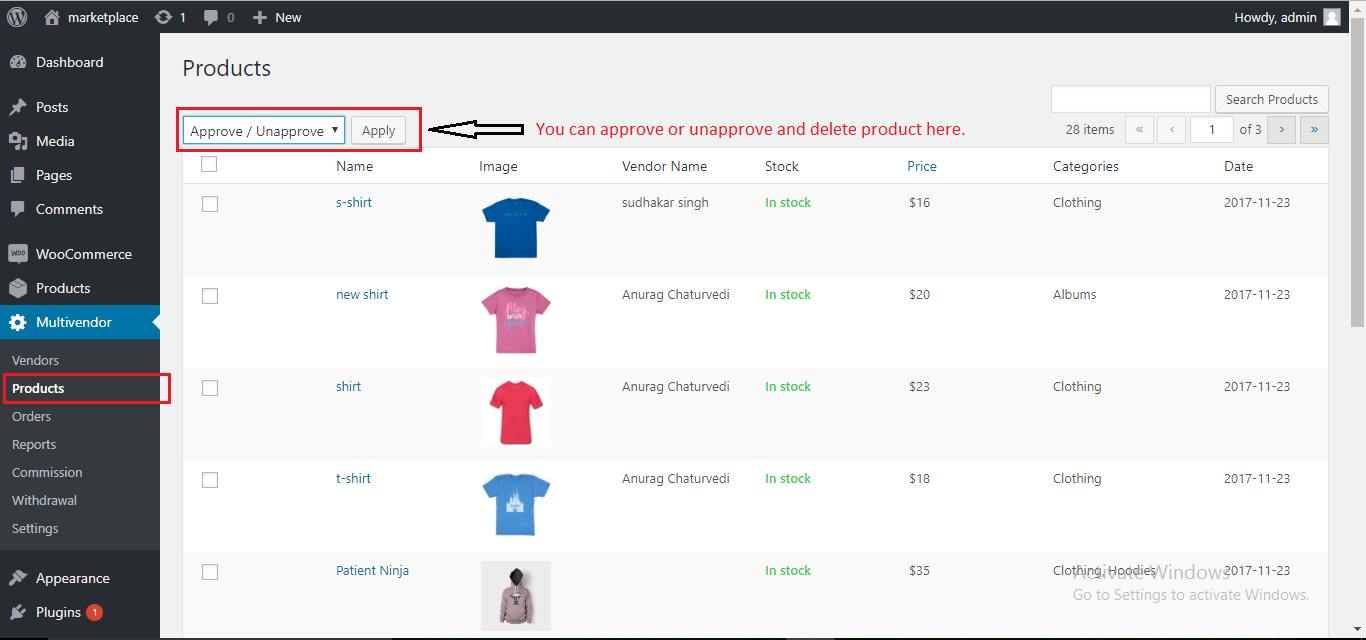
- Click on Products in the menu list. You can look at all the products listed and delete products on this page. As shown below in the snapshot.
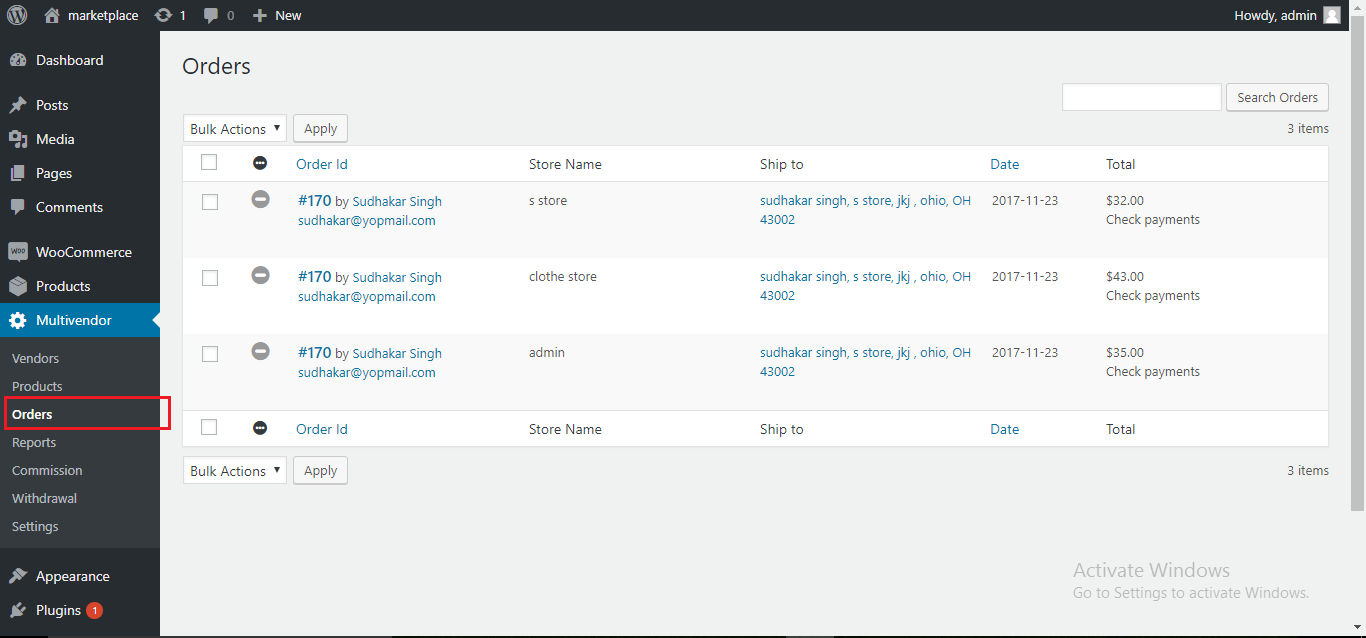
- Click on Orders in the menu list. You can look at all orders list of vendors and delete and edit orders from this page. As shown below in the snapshot.
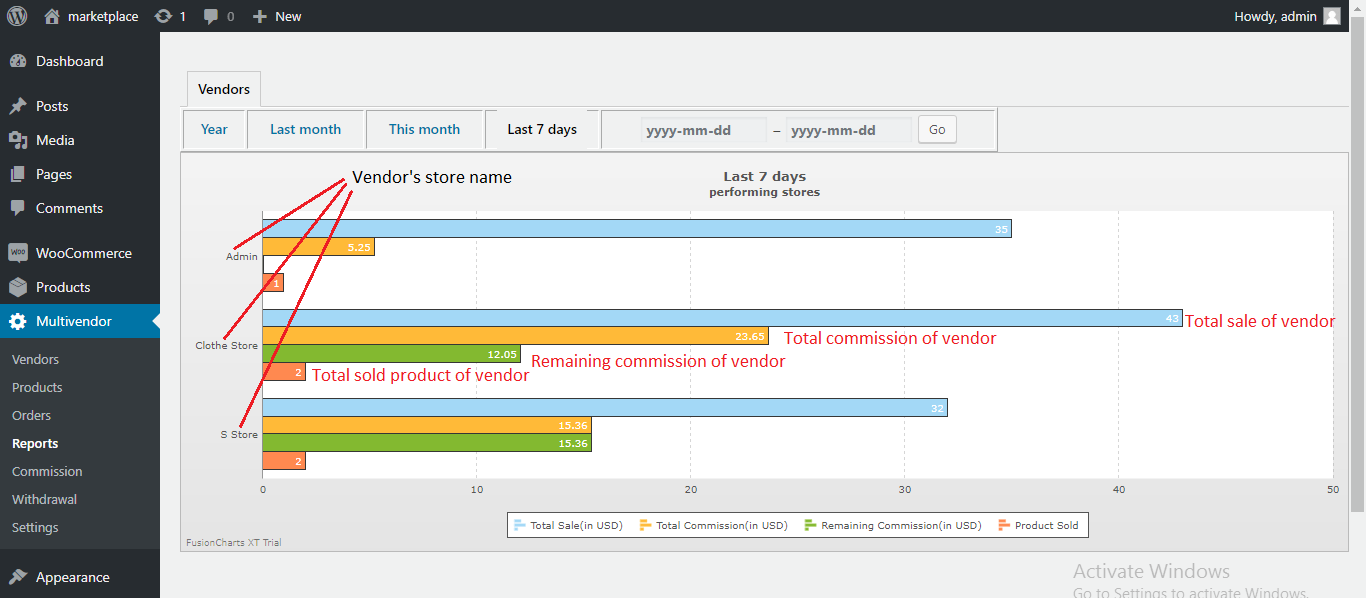
- Click on Reports in the menu list. You can see the last 7 days, the previous month and the current month’s reports of all vendors. As shown
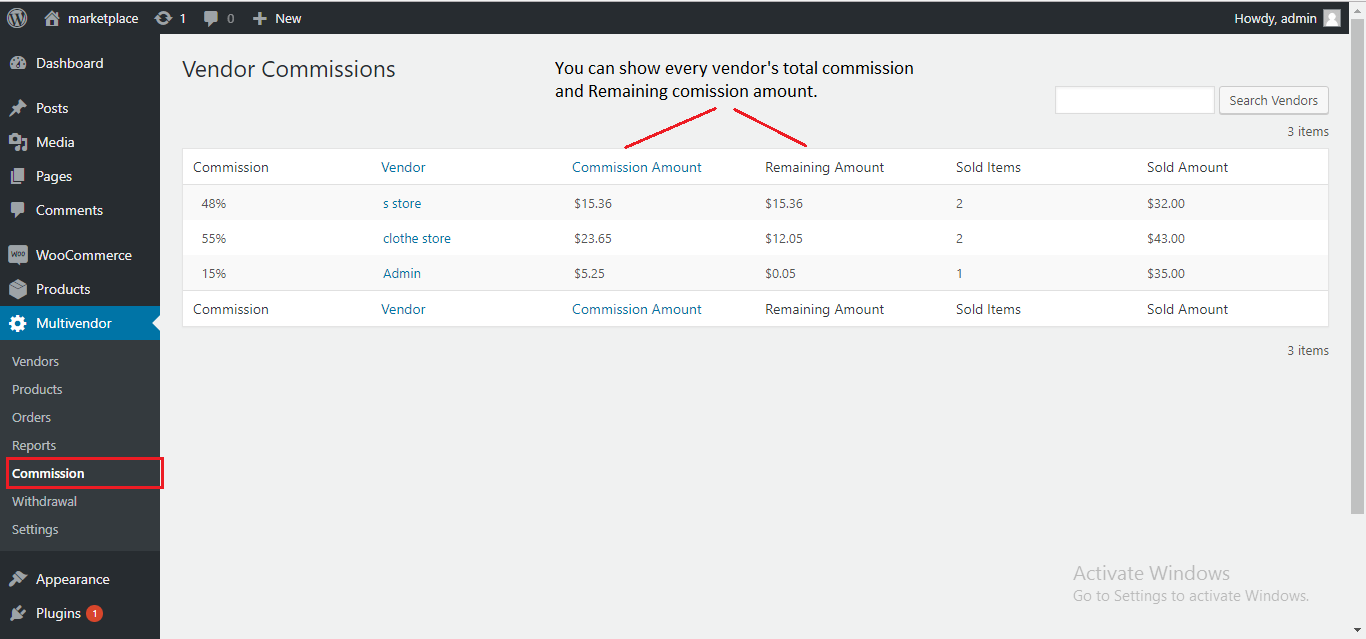
- Click on Commission in the menu list. You can look at the total sold item, the total sold amount, and the remaining commission of every vendor. As shown below in the snapshot.
- Click on Withdrawal in the menu list. You will see the vendor’s withdrawal list as shown below in the snapshot.
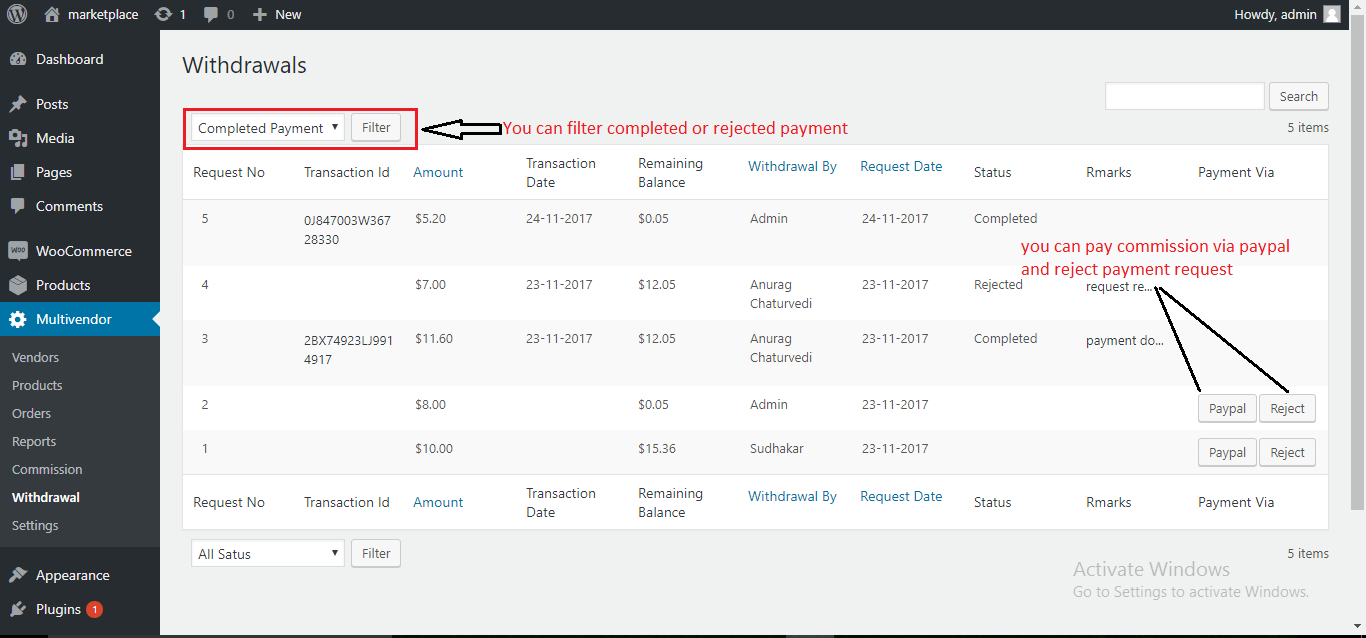
When you click on the reject button you will see a popup window form as shown below snapshot.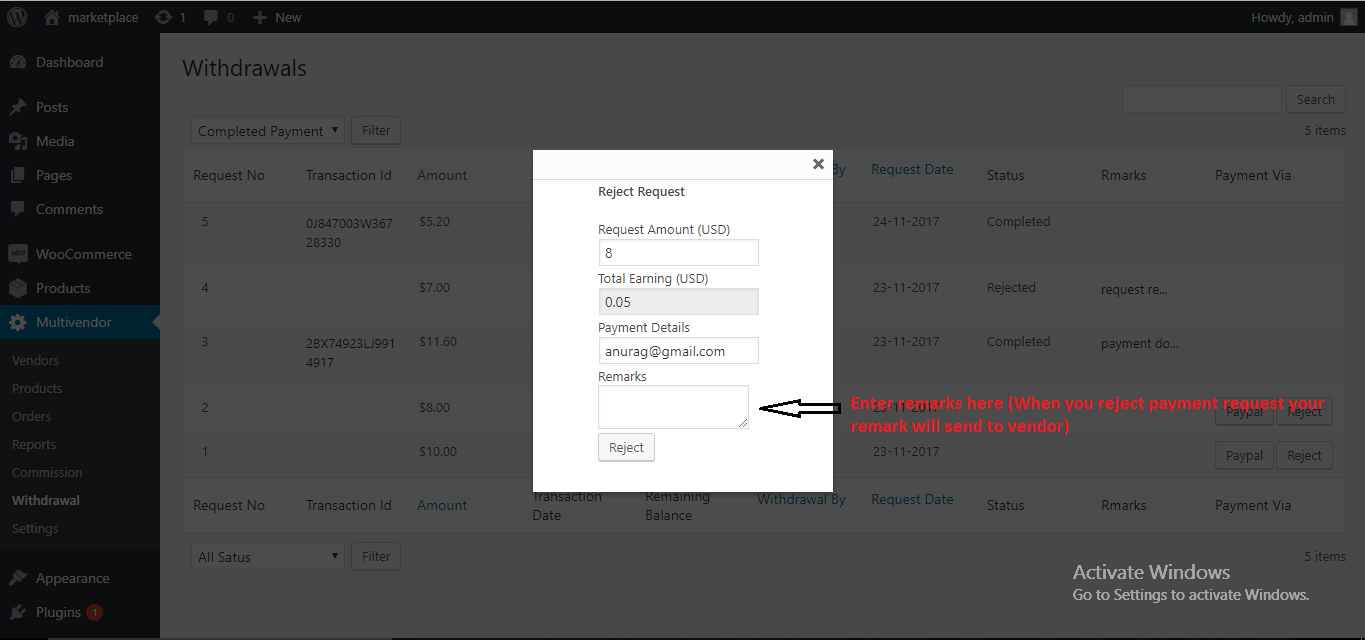
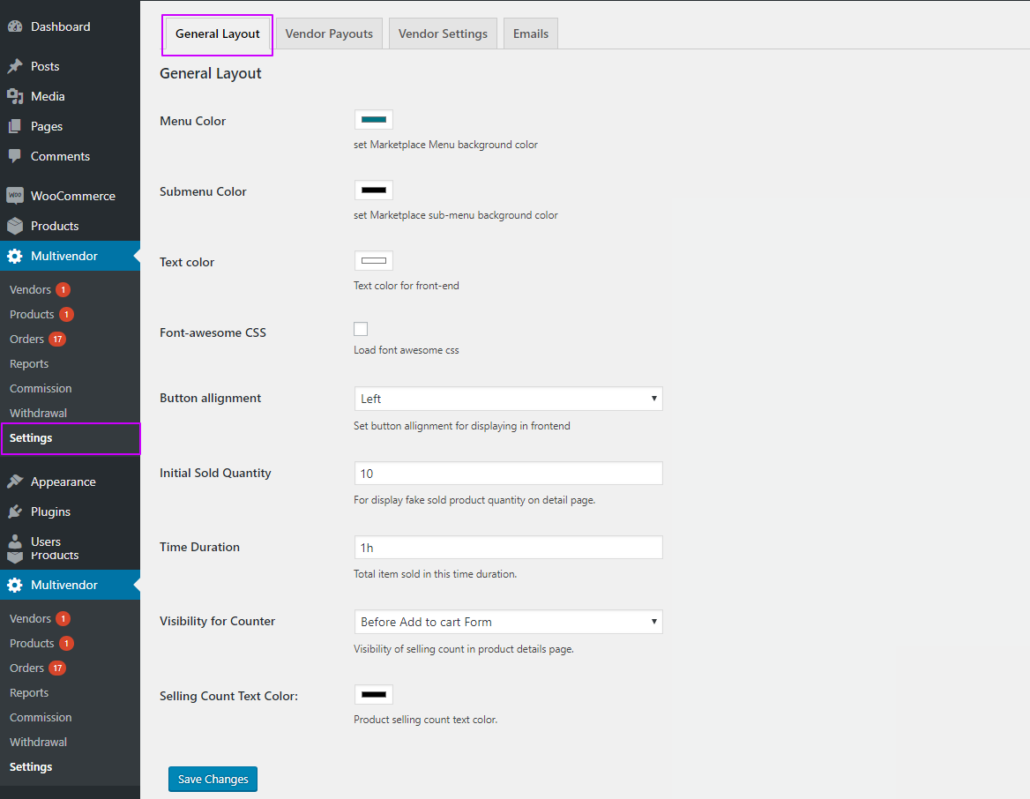
- Click on MultiVendor->Settings in the menu list. You will see the General Layout tab as shown below in the screenshot.
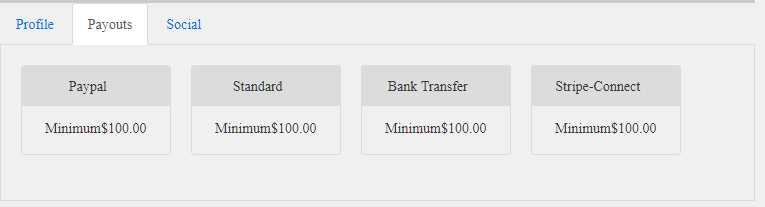
15. Click on the Vendor Payouts tab and you will see the payouts list as shown below in the screenshot.

16. Click on the Vendor Settings tab, you will see the settings of the vendor as shown below in the screenshot.

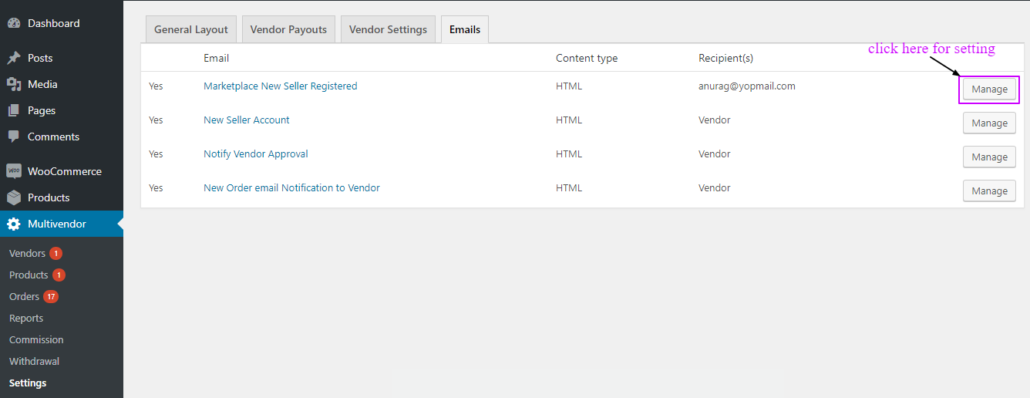
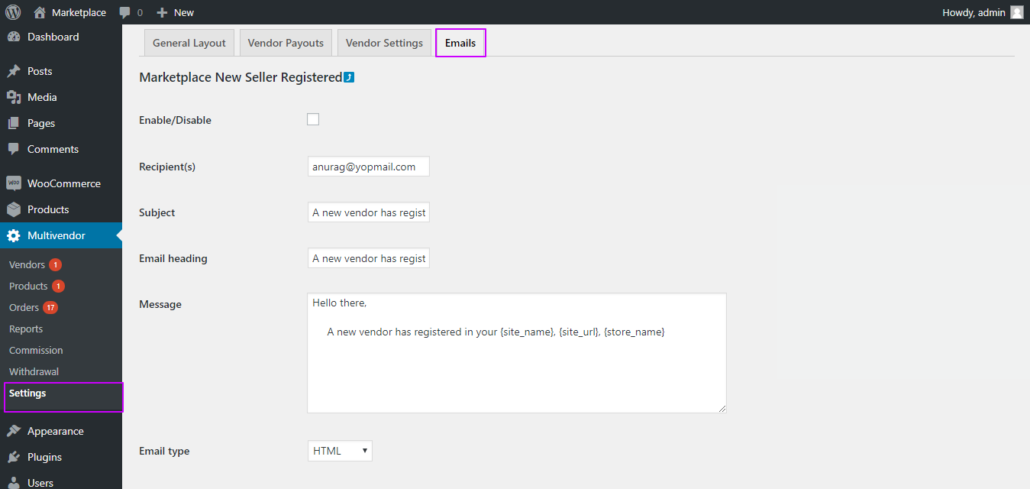
17. Click on the Emails tab as shown below in the screenshot. Mail content can be customized from here for new seller registration, order notification, and vendor approval.
Important Shortcodes:
- [marketplace_vendor_register_form]:- You can use this shortcode for the vendor registration form.
- [marketplace_vendor_login_form]:- This shortcode for vendor login form.
- [marketplace_dashboard]:- You can use a shortcode for the vendor dashboard page.
- [marketplace_products_list]:-If you want to list vendor products somewhere on the website you can use the Marketplace product listing shortcode.
- [marketplace_add_product]:- additionally you can add marketplace add products from your website if needed.
- [marketplace_update_product]:- available Shortcode for updating product form page with the woocommerce marketplace.
- [marketplace_orders_list]:- Multivendor also has a shortcode option for order listing.
- [marketplace_cuopons_list]:- Shortcode for vendor coupon list page.
- [marketplace_add_cuopon]:- This shortcode for adding coupon form.
- [marketplace_update_cuopon]:- Update coupon shortcode form.
- [marketplace_reports]:- generate reports for multi-vendor orders using this shortcode.
- [marketplace_seller_withdrawal]:- Shortcode for vendor withdrawal page. on this page vendor will see all selling amount after deducting admin commission.
- [marketplace_products_review]:- Display the vendor’s products review anywhere you want using this marketplace_products_review .
- [marketplace_seller_details]:- Shortcode for vendor details page.
Front-end:
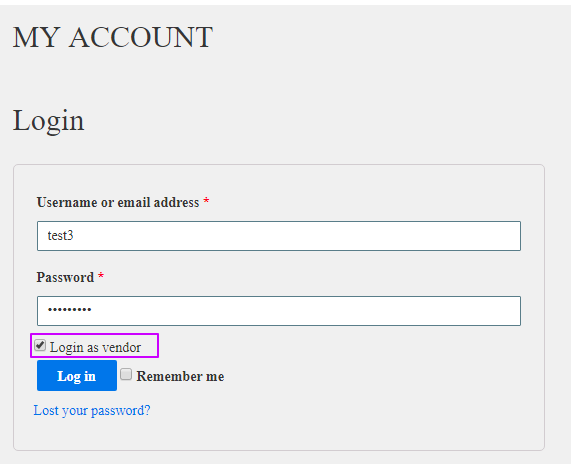
- After completing the admin settings, log in as a vendor as shown below in the screenshot.
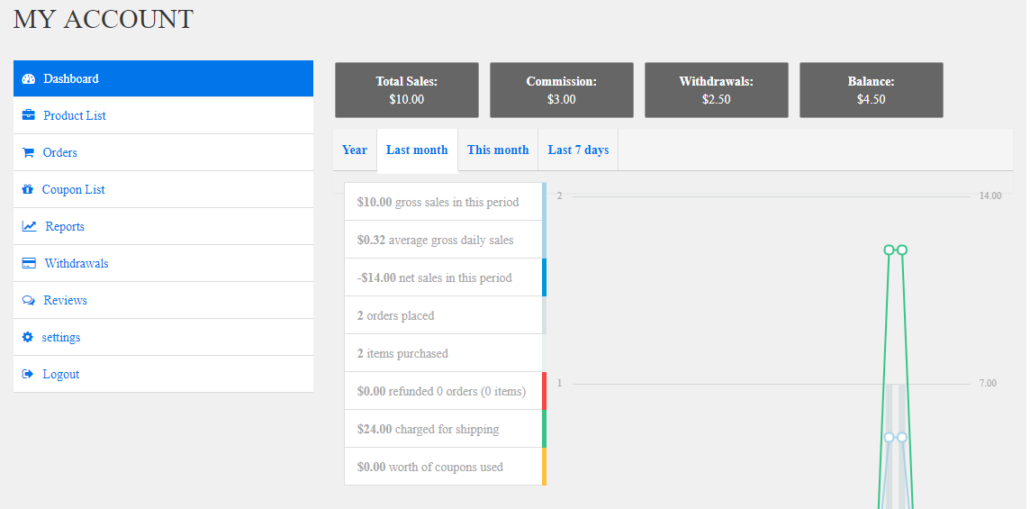
2. After login as a vendor you will see the vendor Dashboard as shown below in the screenshot.
3. Click on Product List in the Menu, you will see all products of the vendor as shown below in the screenshot.
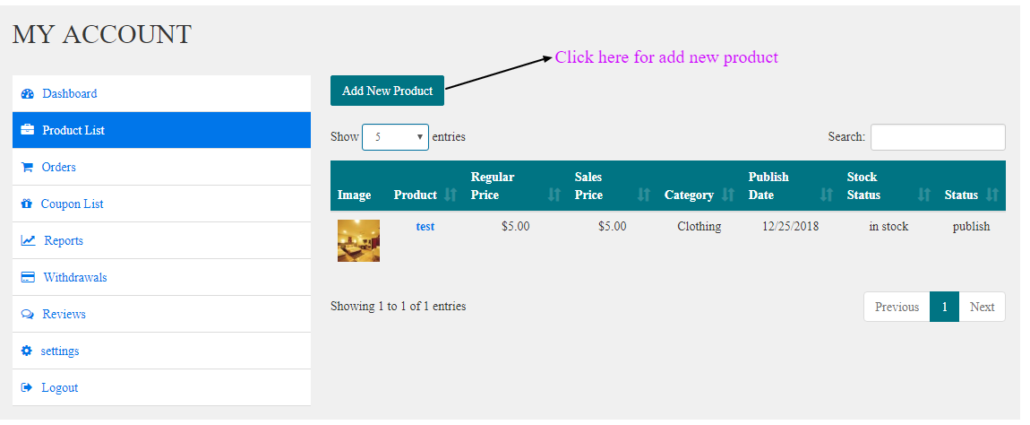
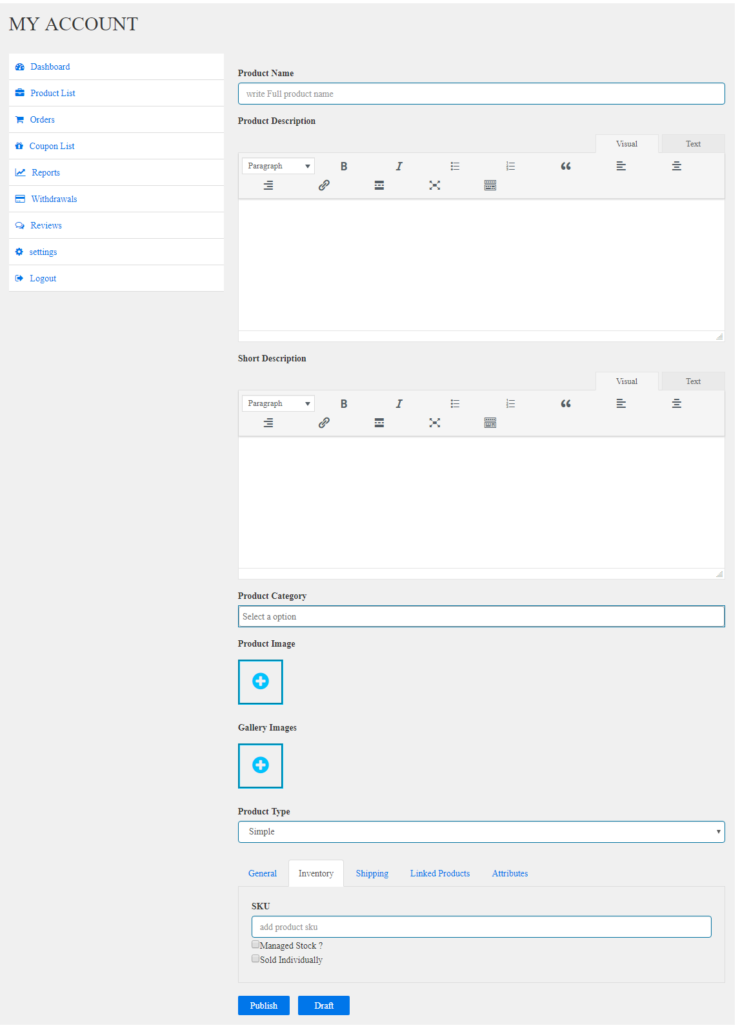
4.Click the New Product button and the Add Product form will appear as shown in the screenshot below.
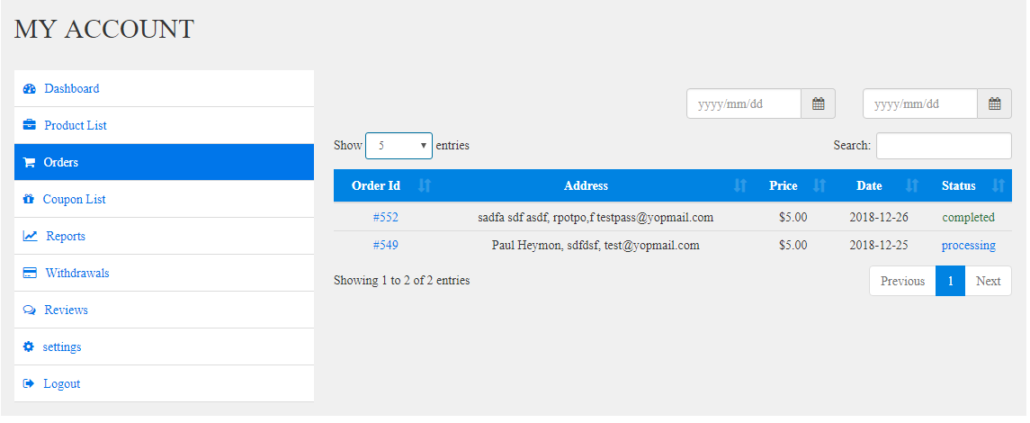
5. Click on Orders in the menu list, you will see the order list as shown below in the screenshot.
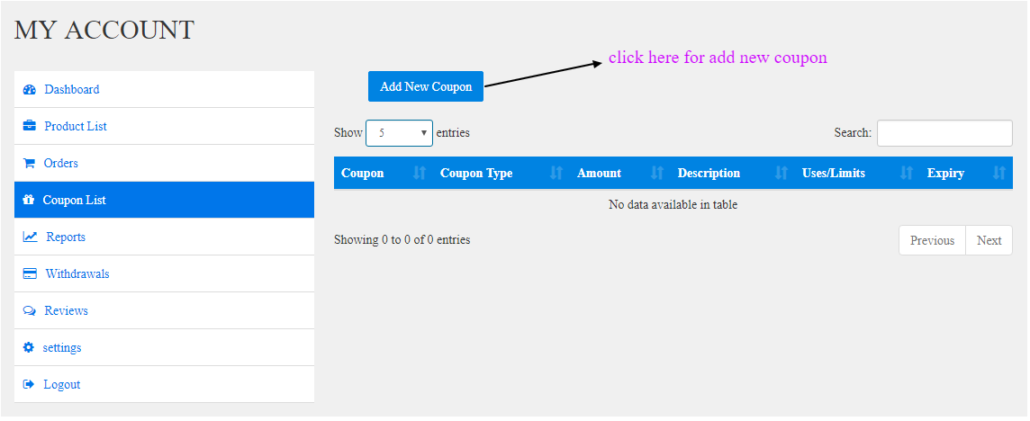
6. Click on Coupon List in the menu list, you will see the coupon list as shown below in the screenshot.

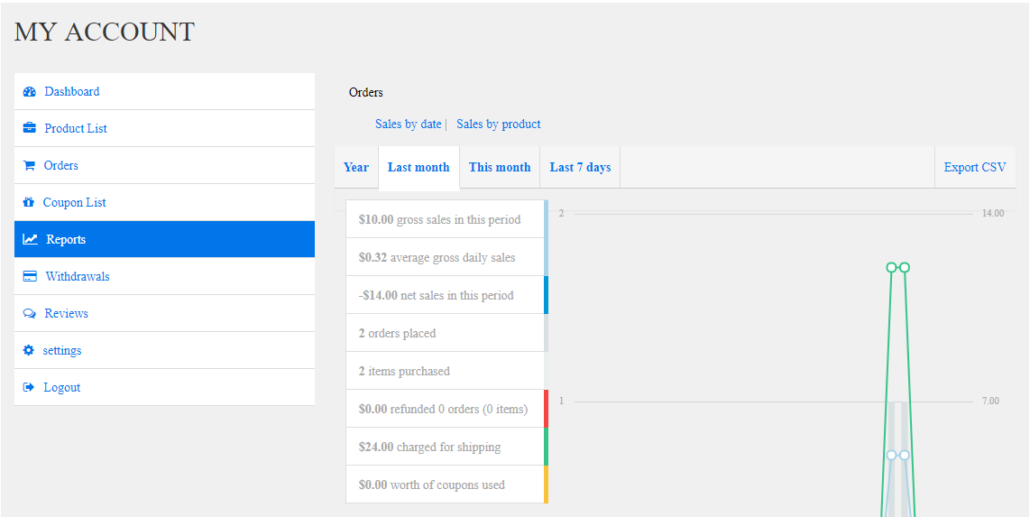
7. Click on Reports in the menu list, you will see the report as shown below in the screenshot.
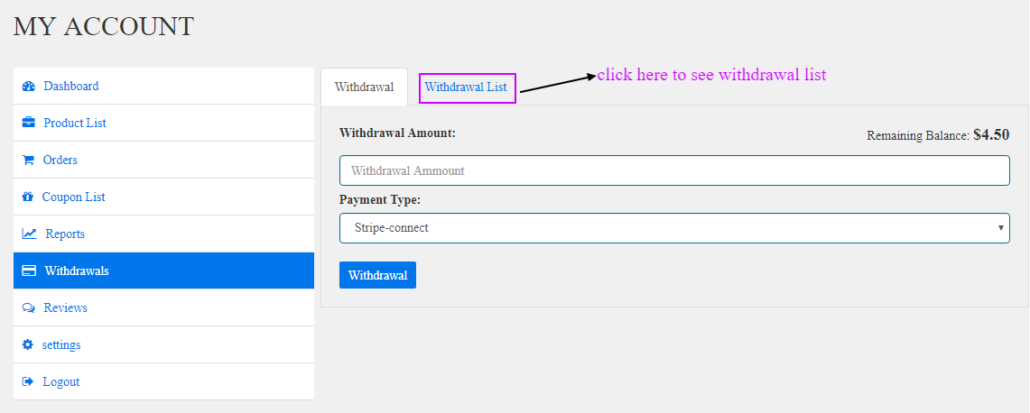
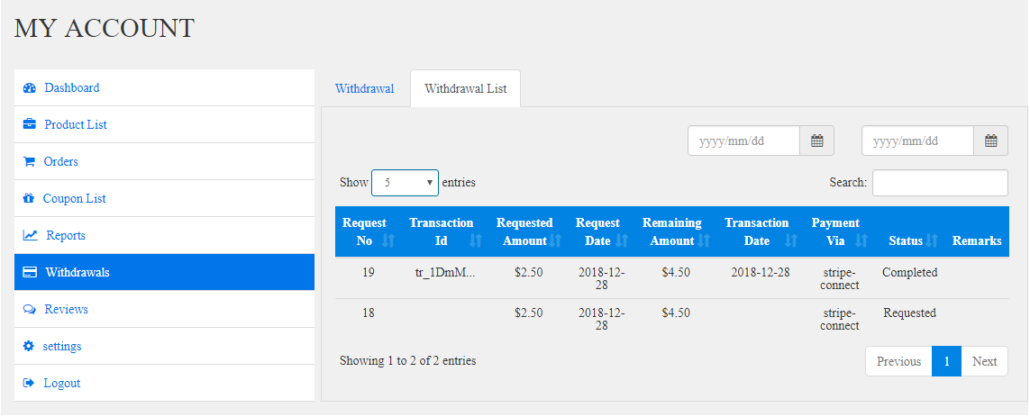
8. click on Withdrawals in the menu list, and the seller will see the withdrawal amount remaining after portal commission after admin commission, you will see the withdrawal form as shown below in the screenshot.
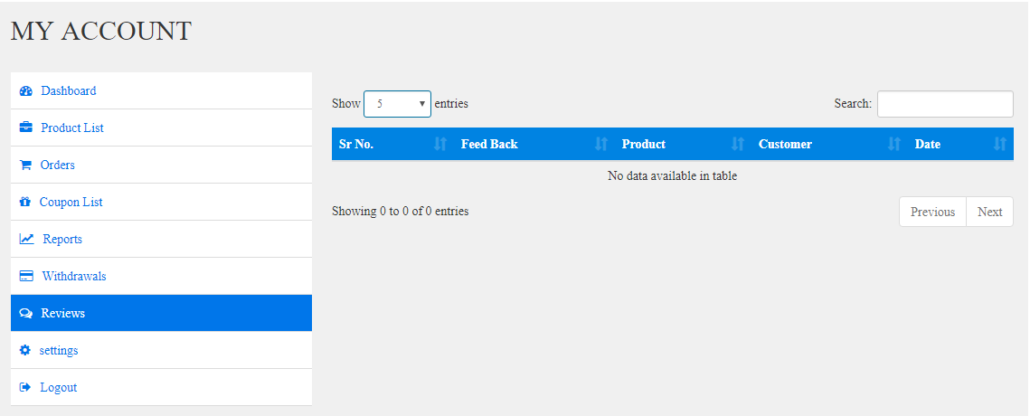
9. Reviews option on the vendor’s account will list all reviews about vendors.
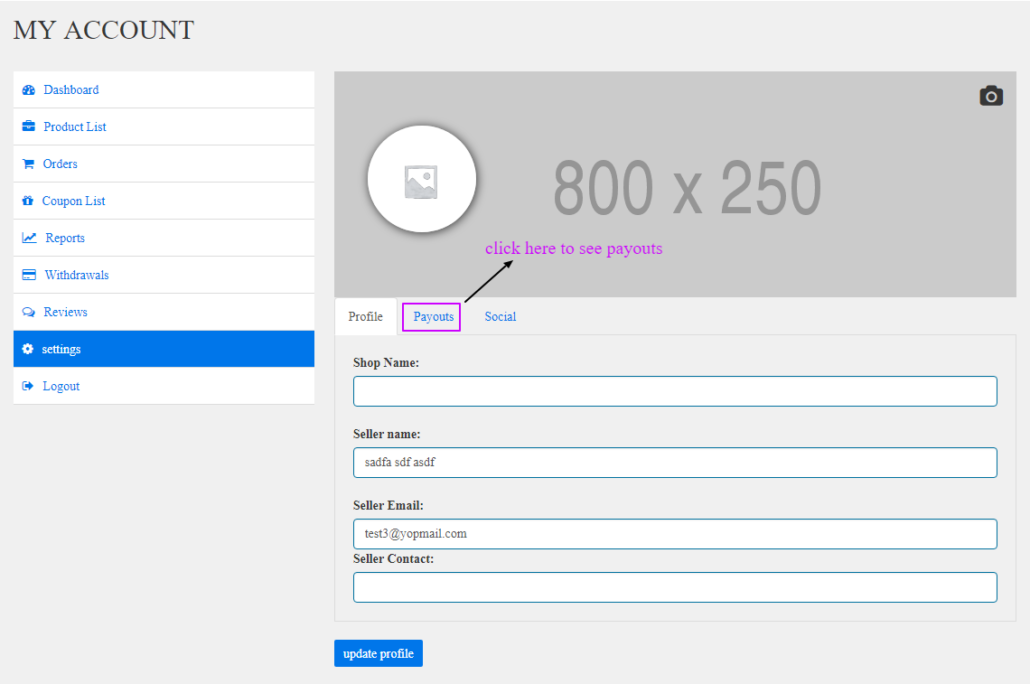
10. Click on Settings in the menu list and you will see the settings of the vendor’s account as shown below in the screenshot.