WooCommerce Point Of Sale is a excellent plugin that allows to sale products at your physical store location. You can also sale products from multiple physical stores. Admin can set products stock for every outlets seperatly. After placing order from physical store inventory will update automatically for every outlets.
WooCommerce Point of sales Features:-
- Administrator can set products stock for every outlets seperatly.
- Admin can add multiple outlets and agents.
- Enble or disable outlets and agents.
- Admin can see reports of all outlets and agents.
- point of sale plugin has option to enable/disable payment methods and shipping methods.
- Point Of Sale agent can search products quickly.
- POS agent can add new customer from pos frontend panel.
- Agent can search products by category wise.
- This plugin has option for agent to save cart.
- Option to apply coupon in the cart.
- Agent can see transactions and order list.
- Outlet agent see order details on clicking on order number in order list page.
- Agent can search old customers.
Screenshots:-
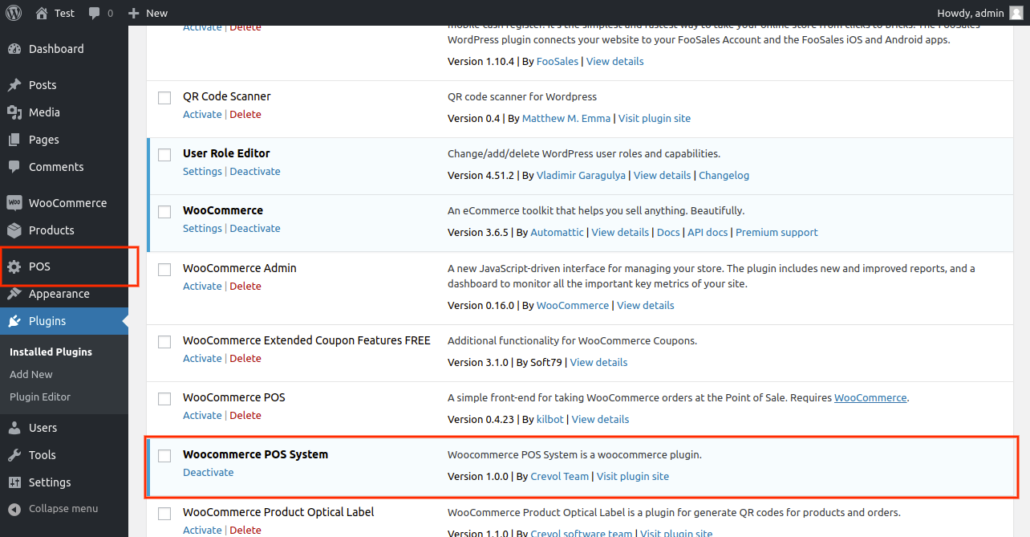
- After activating the plugin you will see Woocommerce Point Of Sale (POS) is in installed plugins, as shown below in the screenshot.
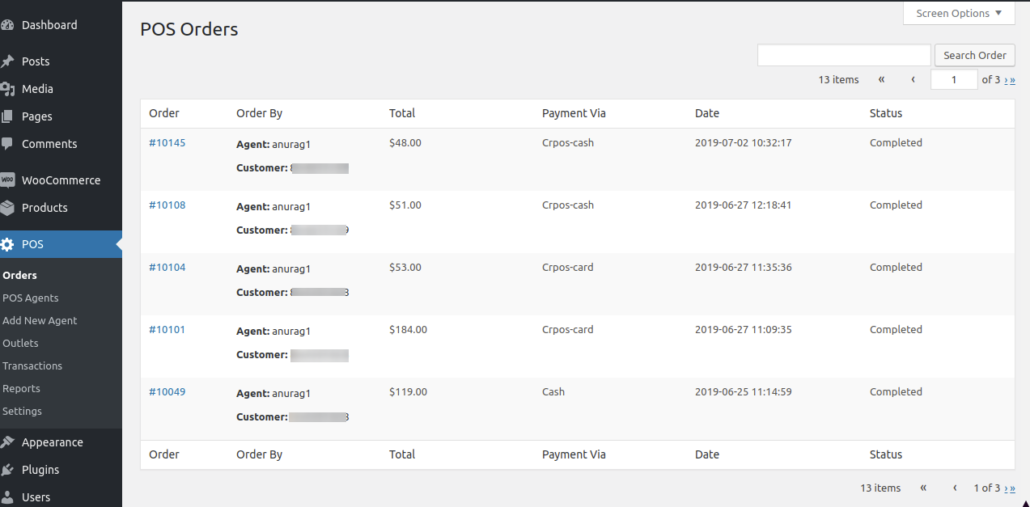
2. Click on POS in menu you will see the POS orders list as shown below in the screenshot.
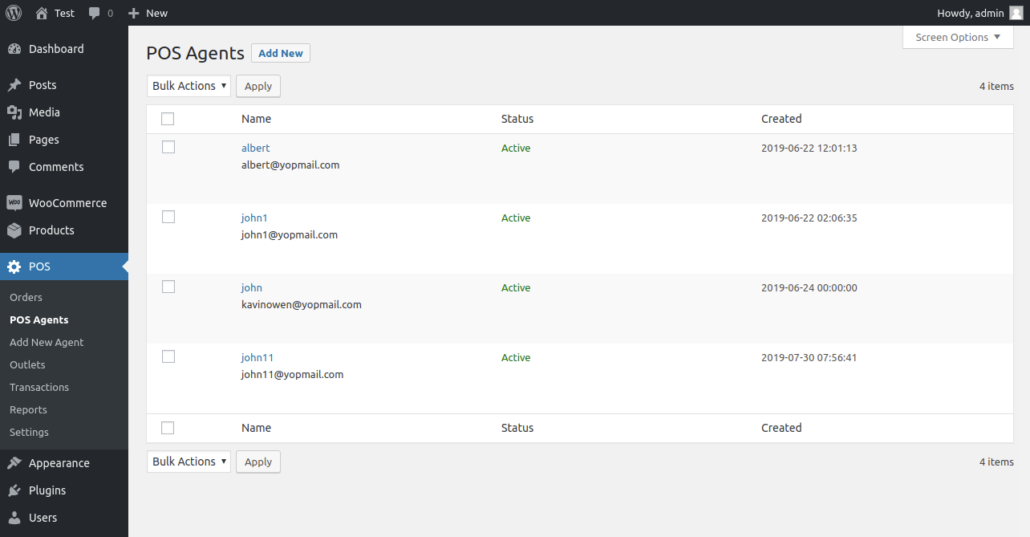
3. Click on POS Agents in the menu of POS as shown below in the screenshot.
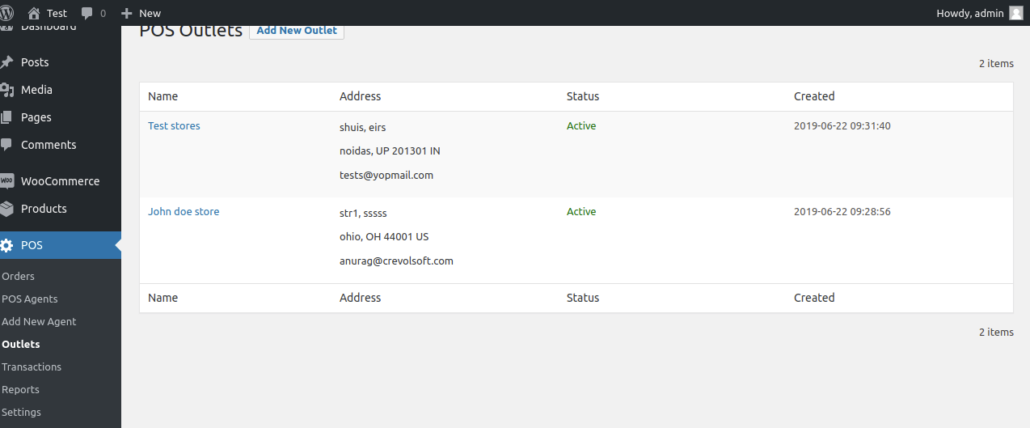
4. Click on Outlets, you will see outlet list as shown below in the screenshot.
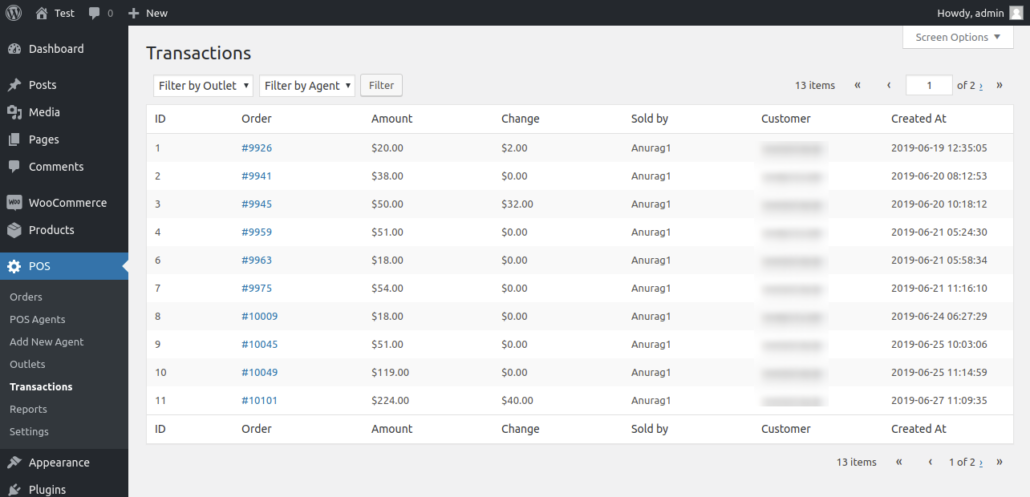
5. After that click on Transactions, you will see all transaction of POS as shown below in the screenshot.
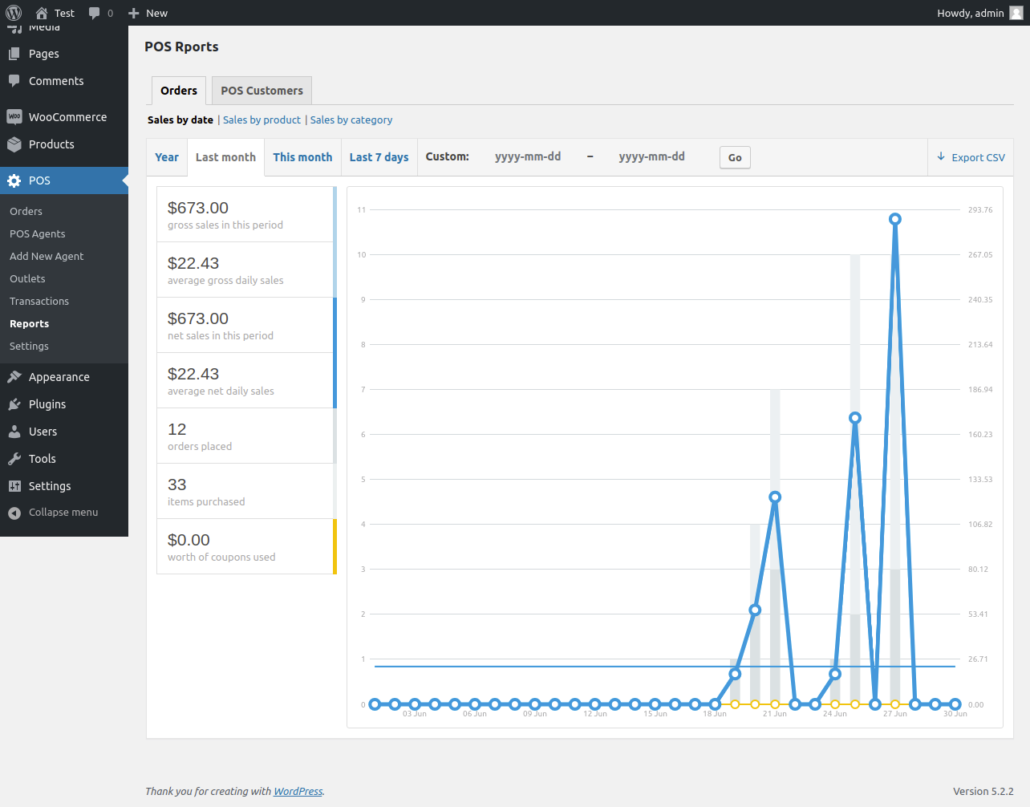
6. Click on Reports in the menu, you will see the report as shown below in the screenshots.
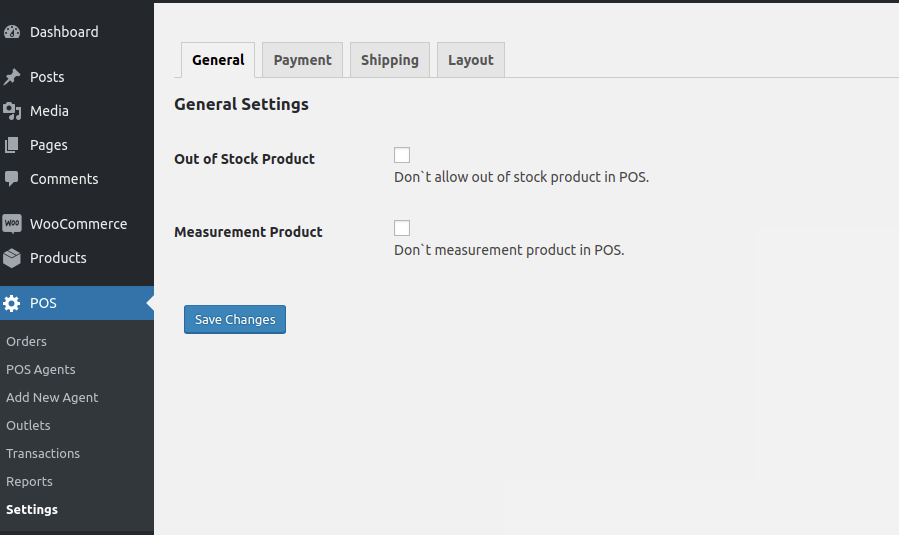
7. Click on settings, you will see the POS settings page as shown below in the screenshot.
Frontend:-
1. Login as POS Agent in frontend, you will see POS, as shown below in the screenshot.
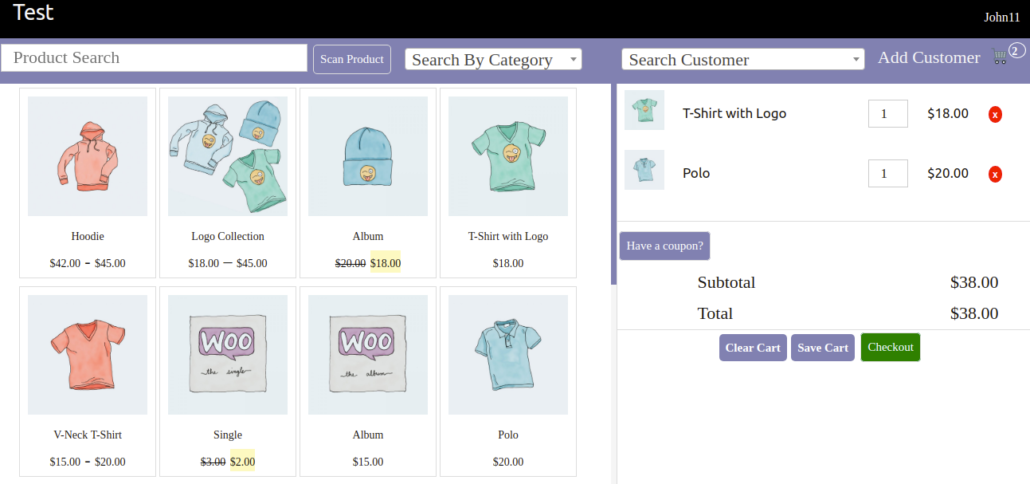
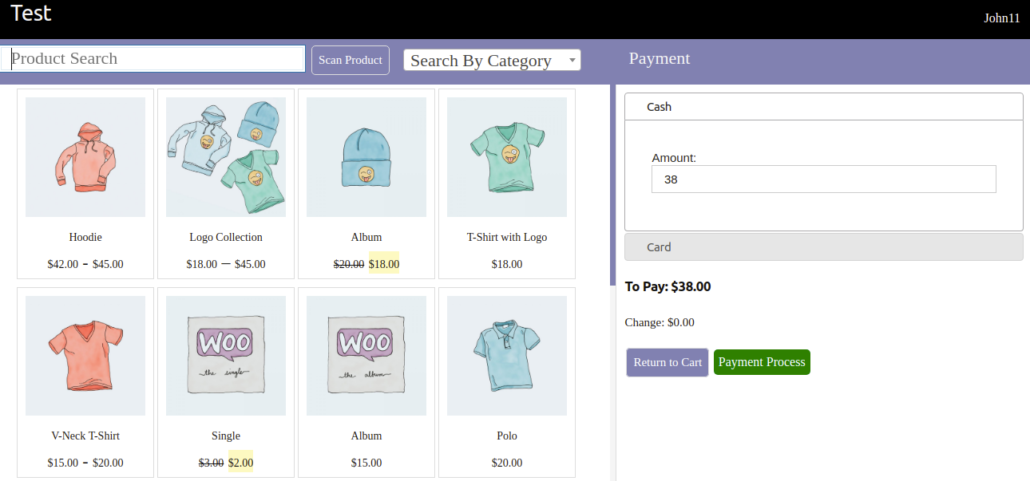
2. Add product in to cart and click on Checkout button, you will see the payment methods as shown below in the screenshot.
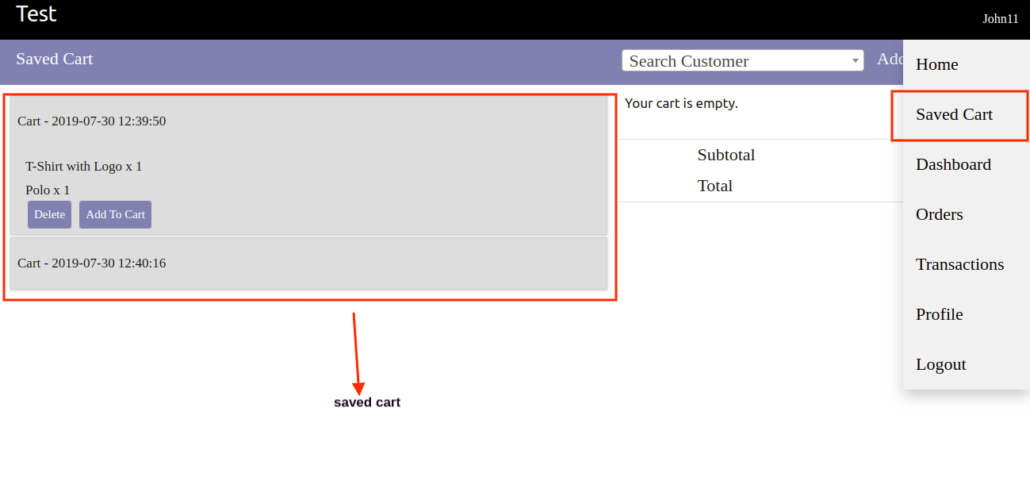
3. Click on Saved Cart in the menu as shown below in the screen shot.
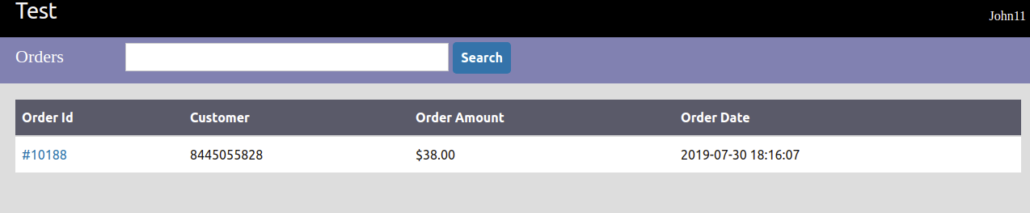
4. Click on Orders in the menu, you will see the all orders of agent, as shown below in the screenshot.
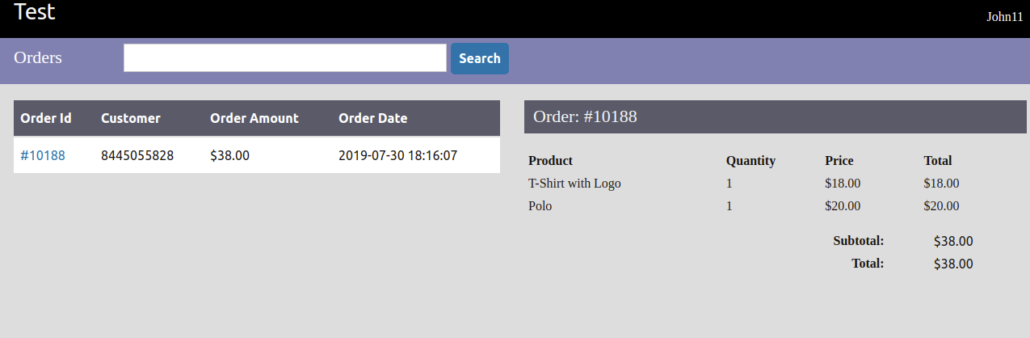
5. After that click on order number, you will see the order details. As shown below in the screenshot.
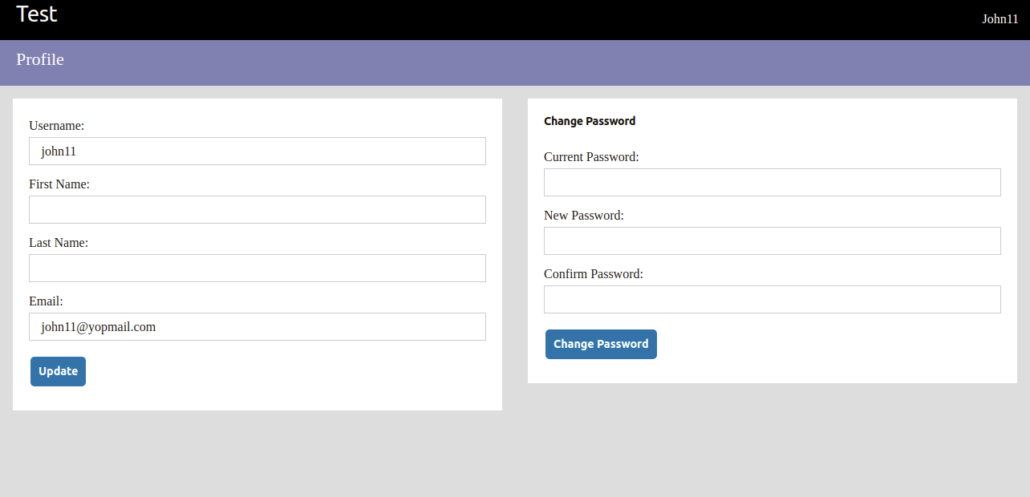
6. Click on Profile in the menu list, you will see Profile page. Here agent can update his profile and change password. As shown below in the screenshot.
For any query/inquiry regarding this plugin, you can write to us at support@crevolsoft.com or generate a ticket at https://support.crevolsoft.com.